Why Shopify Photography Is a Brand System Problem, Not a Product Photo Problem
Amazon sellers lose when their main image doesn't clear the 1:1 white-background bar. TikTok Shop sellers lose when their 15-second hook doesn't stop the scroll. Shopify sellers lose for a completely different reason: their catalog looks like it was photographed by twelve different people, because it was.
The moment your Shopify store crosses roughly 100 SKUs, the "inconsistent product photos" problem stops being cosmetic and starts being a trust signal. A shopper scrolling your collection page at SKU #47 sees studio-clean lighting. At SKU #83 they see a phone photo. At SKU #112 they see an iPhone flash image against a beige wall. The conscious brain registers "they're all the same brand" but the subconscious registers this brand is not organized — which on Shopify, where shoppers have already committed to leaving the marketplace ecosystem and coming to your owned store, is the single biggest breakdown in purchase confidence.
This guide is built around that one observation. The Shopify product photography problem is not a per-photo problem, it's a system problem. Individual photo quality matters less than catalog-wide coherence. A store with 500 "good enough" images that all look like they came from the same shoot will out-convert a store with 50 "stunning" images and 450 random leftovers.
What we'll cover:
- The 2026 Shopify image, video, and 3D/AR specs (the boring-but-necessary table)
- The 8 asset touchpoints most DTC brands under-produce
- The 3-scene system that collapses the "catalog inconsistency" problem into a tractable production pipeline
- Why Shopify Core Web Vitals reward image performance, and how to set yours up correctly
- When to invest in video, 3D, and AR — and when to skip them
- An AI workflow that scales one source photo into a full Shopify asset system
- A concrete migration path for existing stores with ~200 inconsistent SKUs
If you run a DTC Shopify store, headless Hydrogen storefront, or Shopify Plus at scale, this is the playbook. If you sell on TikTok Shop in parallel (many of our readers do), the TikTok Shop pillar covers that surface separately — the logic is different enough that cross-applying the Shopify playbook hurts you on TikTok and vice versa.
If you're new to product photography fundamentals first, start with Product Photography for Beginners (2026) — once those basics are solid, the Shopify-specific system below makes a lot more sense.
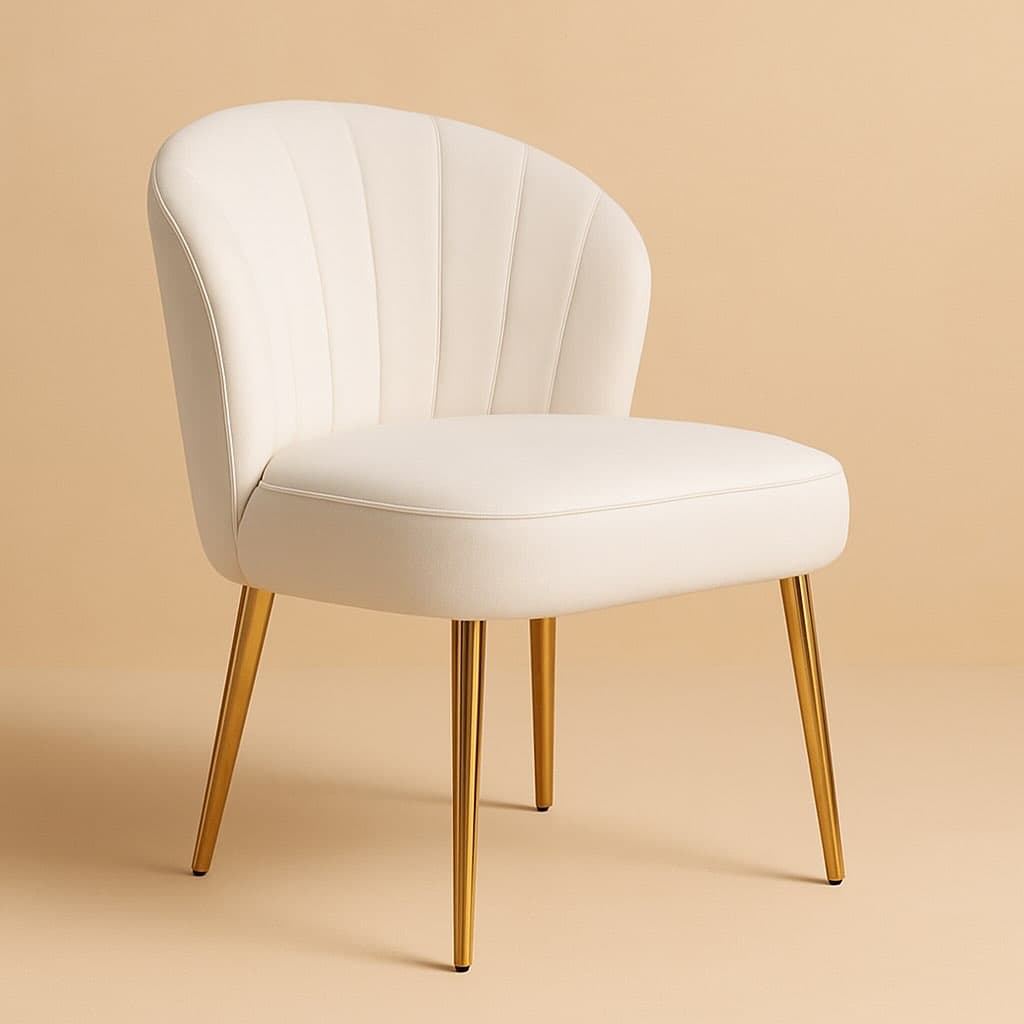
 BEFORE
 AFTER
AFTERThe 2026 Shopify Image, Video, and 3D/AR Specs
Before the strategy, the boring table. Shopify has looser per-file constraints than any marketplace — you can upload a 20 MB, 5000×5000 image, and it won't be rejected. That flexibility is a trap. Can upload and should upload are very different sentences.
Important caveat: Shopify refines its image-handling pipeline regularly, especially around WebP conversion, AVIF support, and Liquid's
image_urlfilter. The numbers below reflect the 2026 ruleset at publish time. For headless Hydrogen storefronts, additional storefront-CDN considerations apply that aren't covered in this spec table.
Product images (PDP main + gallery)
| Field | Spec |
|---|---|
| Maximum upload resolution | 5000 × 5000 px |
| Maximum upload file size | 20 MB per image |
| Recommended resolution | 2048 × 2048 px (square, enables zoom and retina) |
| Minimum for zoom functionality | > 800 × 800 px |
| Target delivered file size | ~300 KB per image (delivered, after Shopify optimization) |
| Formats accepted | JPG, PNG, HEIC, WEBP, PSD, TIFF, BMP, GIF, SVG |
| Formats recommended for upload | JPG or PNG (Shopify auto-converts to WebP/AVIF on delivery) |
| Max product images | No hard limit — practical ceiling is 10-12 for UX |
| Color space | sRGB |
Uploading as WebP at 80-85 quality is the 2026 best-practice baseline for stores where the production pipeline supports it, but JPG/PNG uploads are fine — Shopify's image pipeline auto-converts and serves WebP (and AVIF on supported themes and browsers).
Collection, banner, and hero imagery
| Surface | Recommended spec |
|---|---|
| Desktop hero banner | 2560 × 1080 px or 1920 × 1080 px |
| Mobile hero banner (if split) | 1080 × 1440 px |
| Collection list thumbnail | 1200 × 1200 px (displayed at 400-600 px on most themes) |
| Collection hero image | 1920 × 720 px |
| Blog post featured image | 1200 × 675 px (16:9) |
| Cart upsell thumbnail | 400 × 400 px minimum |
| Favicon | 32 × 32 px |
Themes vary on exact crops and hot zones. Design your hero imagery with the assumption it will be cropped at 3 different aspect ratios across desktop, tablet, and mobile — most themes reuse the same source image.
Product video
| Field | Spec |
|---|---|
| File formats | MP4, MOV |
| Max file size | 1 GB |
| Max resolution | 4096 × 2160 px |
| Recommended resolution | 1920 × 1080 px (1080p), H.264 codec |
| Delivered format | MP4 or HLS (adaptive streaming) |
| Delivered quality tiers | 480p / 720p / 1080p based on connection |
| Ideal PDP video duration | 10-30 seconds (loop- or hook-based) |
| Audio | Optional — most PDP videos perform well muted with captions |
3D models + AR
| Field | Spec |
|---|---|
| Formats | GLB (web/Android), USDZ (iOS Quick Look) |
| Max file size | 500 MB |
| Recommended file size | Under 5 MB with Draco compression |
| Scale requirement | 1:1 with real product for AR accuracy |
| Delivery | Shopify automatically serves correct format per device |
| Surface | PDP gallery (rendered inline with "View in your space" AR button) |
For most categories, 3D/AR is optional. For furniture, eyewear, watches, large home goods, and anything where "will it fit in my space" is a purchase question, it's a measurable conversion lift — covered further down.
The Storefront Asset Stack: 8 Touchpoints Most DTC Brands Under-Produce
A Shopify listing is not just a product detail page. It's roughly 8 distinct visual surfaces, and the brands that win the consistency game treat all 8 as first-class deliverables rather than afterthoughts. Most stores optimize surfaces 1 and 4 and leave 2, 3, 5, 6, 7, and 8 as whatever-the-theme-does.
1. Homepage hero. The first thing a visitor sees. Not your best product photo — your most representative photo. Brand voice, model demographic, scene archetype, color palette. This image sets the expectation that the next 60 seconds of browsing has to meet.
2. Collection page cards. Often overlooked because the theme handles them automatically from the PDP main image, but collection-card consistency is where shoppers form their "this brand is organized" (or "this brand is sloppy") impression. Budget to produce an alternate cropping of every PDP main optimized for the card display ratio — usually square or 4:5.
3. Product card hover / swap. Premium themes support an alternate image that appears on hover. Use it. Default PDP main on rest; lifestyle or detail shot on hover. Free A/B test built into every theme.
4. PDP main image. 1:1 white or neutral background, highest clarity, the canonical "this is the product" shot. Same role as Amazon's main image.
5. PDP gallery (5-8 additional angles). This is where Shopify's flexibility shines compared to marketplaces. Use the full space: lifestyle, detail, scale reference, alternate angle, packaging, and optionally color variants. Shopify's zoom on hover rewards high-resolution images (2048 px+) here specifically.
6. PDP video. Secondary media in the gallery. Short (10-30s), muted, loops well, shows the product in use or rotating. Not the same as a TikTok Shop hero video — these are calm, informational, design-polished.
7. Cart / upsell thumbnails. Smaller crops that show up in cart drawer, post-purchase upsell modules, and email receipts. Often cropped tighter than PDP main because the display is small (60-80 px).
8. Email + post-purchase touchpoints. Shipping notifications, review requests, cross-sell flows — these all pull product imagery. If your email template's thumbnail is the 2048×2048 PDP main scaled down, it looks fine. If the email picks up a fallback "beige wall iPhone photo," your post-purchase communications undermine the brand you just built on the storefront.
Produce for all 8. A catalog with inconsistent coverage across these surfaces reads as "inconsistent brand" even when every individual image is competent.
The Brand Consistency Problem — and the 3-Scene System That Solves It
Here is the observation that changes Shopify photography economics. The "same-photographer-feel" problem is not actually a photographer problem. It's a scene-definition problem.
Every brand that has more than 50 SKUs and looks coherent has, consciously or accidentally, settled on a finite set of visual scenes that every product gets photographed in. The scene is the answer to "where is the product?" And the scene is what produces the brand feeling, not the product itself.
Most brands do this in an ad-hoc way. The disciplined version is a 3-Scene System: three clearly defined scene archetypes that, together, cover 80-90% of your catalog needs. Everything gets one primary scene; some premium SKUs get a second; hero imagery rotates across all three.
A worked example for a skincare brand:
- Scene A — Pure studio. Neutral warm-gray background, soft top-left key light, no styling props. Every SKU gets this as the PDP main plus one detail shot.
- Scene B — Morning ritual lifestyle. Natural light, marble counter, soft green plant out-of-focus in background. Every SKU gets one in-context shot here. This covers about 40% of lifestyle uses on the storefront.
- Scene C — Hands / texture. Close-up of product being used (applied, dropped, poured). Covers ingredient-led marketing and PDP detail galleries.
Total shoots per SKU: 3-5 images (depending on SKU tier). Total scenes for the entire brand: 3. Every photo across 500 SKUs looks like it came from the same shoot because it did — from the same scene template.
The production unlock of AI here is that the scene becomes a prompt, not a physical set. Once Scene A / B / C are defined (through the Visual Syntax Framework), scaling to 500 SKUs doesn't mean booking 500 shoots. It means running 500 products through the same 3 prompts.
Two warnings if you try this:
- Define the scenes before you generate anything. It's tempting to iterate on scenes while producing imagery. Don't — you'll end up with drift. Lock the prompts before the catalog run.
- Source images matter. AI tools output is bounded by source quality. A blurry phone photo in doesn't become a studio-grade generated image out. The $25 DIY setup in our case study is sufficient source quality for the entire workflow.
 BEFORE
 AFTER
AFTERCore Web Vitals & Shopify: Why Image Performance Ranks You Higher
Google has weighted Core Web Vitals into organic search ranking since 2021, and the weighting has only increased. For Shopify stores, LCP (Largest Contentful Paint) is almost always an image problem, specifically the PDP main image or the homepage hero.
Shopify does a lot of this for you — WebP/AVIF conversion, responsive srcset, CDN delivery via Fastly. But it doesn't override bad inputs. The three ways Shopify stores most commonly fail LCP:
1. Uploading the 20 MB source file instead of a 2-5 MB optimized source. Shopify will serve the optimized version, but generating it the first time delays the response. For the first few visitors after a product update, the experience is slow. Compress at upload to 2048×2048 and under 2 MB.
2. Running the homepage hero as a client-rendered component without priority loading. This is a theme-code issue, not a Shopify platform issue. For custom themes (and Hydrogen storefronts especially), ensure your hero image uses the Liquid image_url filter with width parameters OR, in Hydrogen, the Image component with loading="eager" and fetchpriority="high".
3. Shipping imagery with dimensions wildly larger than the rendered size. A collection card rendering at 400 px that sources from a 2048 px image wastes 80% of the bytes, even with WebP. Use Shopify's img_url: '400x400' or the modern image_url: width: 400 Liquid filter to request the right size per surface.
The speed-conversion correlation on Shopify is well-documented — the Shopify internal data cited frequently in speed-optimization case studies shows roughly 10% conversion lift per 1 second of LCP improvement, up to about 2.5 seconds, after which gains flatten. For a $2M/year Shopify store, a 1-second LCP improvement is real money.
If you want the deeper technical treatment, our complete guide to e-commerce image optimization covers the srcset / sizes / priority / LCP interactions across platforms.
Video on Shopify: PDP, Home, and Storefront Atmosphere
Shopify product video plays a different role from TikTok Shop product video. TikTok video earns attention; Shopify video confirms purchase intent. The shopper is already on your store, already considering the product — video answers the leftover questions (size, movement, fit, packaging) that static images can't.
Three video types worth producing, in descending order of priority:
1. PDP gallery video — 15-25 seconds. Embedded in the product image gallery. Shows the product rotating, in use, or demonstrating a feature. Muted autoplay with captions. Shopify's gallery will loop it automatically in most themes. This is the highest-ROI video.
2. Homepage hero video loop — 5-8 seconds. Background video behind the homepage hero text. Muted, subtle motion, loops seamlessly. This is an atmosphere asset, not a content asset — the viewer is still reading your hero headline while the video plays in peripheral vision. Keep under 2 MB; if you can't, use a static hero image and skip video.
3. Category landing page video — 30-60 seconds. A "brand film" style piece at the top of high-value collection pages. Lower-priority because most visitors arrive at PDPs, not collections, but useful for premium brand positioning.
AI Product Video handles the PDP gallery use case cleanly — upload a product image, get a 9:16 or 1:1 video with natural motion and brand-consistent styling. For atmospheric homepage loops, you'll usually want a dedicated shoot or stock-licensed cinematic footage; AI works but the motion control is more limited than for product-focused clips.
3D & AR: When to Invest and When to Skip
Shopify's native 3D and AR support is genuinely impressive — GLB models, auto-converted USDZ for iOS, "View in your space" button that Just Works for the visitor. But the production cost is real. A proper 3D model of a product runs $300-$2000 per SKU in 2026 (down from $1000-$5000 pre-AI, but still not free). For a 500-SKU catalog, that's six figures.
So the question is: for which categories does the conversion lift justify the cost? Based on publicly-shared Shopify merchant data and our own conversations with merchants:
Strong fit — invest:
- Furniture — "will it fit in my living room" is the #1 pre-purchase question
- Eyewear — "will the frame look right on my face" (AR try-on)
- Watches + jewelry — scale, material finish, band flex
- Large home goods (rugs, planters, lamps) — scale reference matters
- Footwear (fashion-forward brands) — on-foot visualization
Weak fit — usually skip:
- Beauty, skincare, cosmetics — the product is small, the experience is tactile/olfactory
- Food + beverage — consumable products don't benefit from 3D
- Electronics and gadgets (most) — customers trust spec sheets over 3D walkarounds
- Apparel (non-fashion-forward) — 2D on-model imagery is usually enough
Emerging fit — experiment:
- Fragrance and candles — bottle geometry rendered well can drive premium pricing
- Collectibles and trading cards — enthusiasts respond strongly to 3D detail views
The production workflow has simplified considerably: AI-assisted 3D generation from product photos is now viable for many flat-pack / geometric products at a fraction of traditional 3D studio cost. For bespoke or organic shapes, traditional 3D scanning or modeling still wins.
AI Workflow: From One Source Image to the Full Shopify Asset System
The TikTok Shop pillar covers a 7-asset workflow per SKU optimized for video-first distribution. Shopify demands fewer total assets per SKU but more variants per surface — the same product image in 5 different crops and 3 resolutions. The workflow below is specifically built for Shopify's multi-surface model.
Input required: one clean studio-grade photo per SKU. Either shot via the $25 DIY setup or an existing catalog image of adequate resolution (2048 px+).
Step 1 — Define the 3-scene system. Before touching the generator: write the three scene prompts for your brand. Reference the Visual Syntax Framework. Lock them. This step is done once for the entire brand, not per SKU.
Step 2 — Produce the PDP gallery per SKU. Using AI Product Photoshoot, generate 5-8 images per product against the 3 locked scenes: 1 studio (Scene A) main image, 2 lifestyle (Scene B), 2 detail (Scene C), plus 1-2 scale / alternate angles. Output at 2048×2048 for the main image, 1600×1200 or native product aspect ratio for gallery supporting images.
Step 3 — Lifestyle on-model shots for applicable categories. Fashion, accessories, beauty, personal care — feed the source image into AI Model Photoshoot for 2-3 on-model lifestyle variants. Use the virtual try-on guide for category-specific prompt techniques.
Step 4 — Alternate scene variants via background swap. Background Changer lets you take a locked studio cut-out and drop it into Scene B or Scene C backgrounds. Useful for producing "seasonal" variants (summer vs winter lifestyle) without reshooting or regenerating from scratch.
Step 5 — PDP video for priority SKUs. Not every SKU needs a video. Start with your top 20% by revenue. Run each through AI Product Video for a 15-20 second 1:1 or 9:16 output. Muted-playable, loops cleanly.
Step 6 — Resolution normalization and cropping. This step is Shopify-specific. For each generated PDP main, produce:
- 1:1 at 2048 px (PDP zoom)
- 1:1 at 1200 px (collection card)
- 4:5 at 1200×1500 (mobile collection cards on some themes)
- 1:1 at 400 px (cart thumbnail)
- 1:1 at 1200 px WebP at 85 quality (email-safe)
Image Upscaler handles low-resolution source images upgrade to the 2048 px target where needed.
Step 7 — Transparent PNG for cut-outs. For cart drawer, upsell modules, and email templates that render against arbitrary backgrounds, you want transparent-background versions. Background Remover produces these from the studio main image. Our background-removal pillar walks through the edge cases (hair, reflective surfaces, glass).
 BEFORE
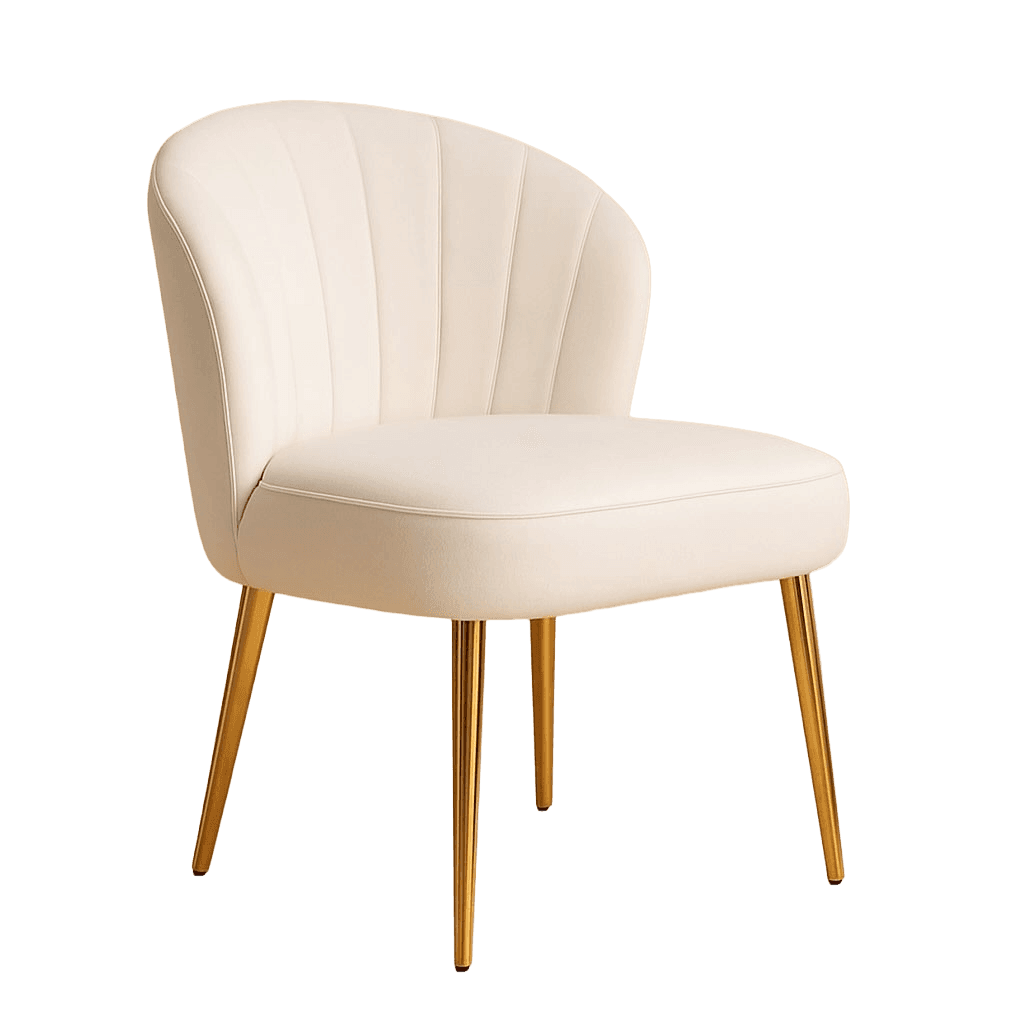 AFTER
AFTEROutput per SKU: 5-8 PDP gallery images + 2-3 lifestyle variants + 1 optional video + 3-5 resolution variants for cross-surface use + 1 transparent PNG = a complete Shopify asset pack for one product, produced in under 2 hours of review and curation.
Output per 100 SKUs: at roughly 2 hours each, 200 hours — roughly one production staffer for a month — to produce a brand-consistent full asset system for a 100-SKU store. Compare with the traditional photography cost of ~$2,000-$4,000 per product and the speed difference becomes existential, not incremental.
Migrating 200 Existing SKUs to a Consistent System
Most readers of this pillar don't have a blank slate. They have 200 inconsistent SKUs, two years of mixed-source imagery, and a catalog that visibly looks like it was built over time by different people. Here's the rollout plan that works:
Week 1 — Audit. Tag every SKU in Shopify admin by visual tier:
- Tier A — brand-consistent: keep as-is
- Tier B — usable but off-brand: keep in place for now, regenerate later
- Tier C — embarrassing: regenerate first
Don't regenerate Tier A assets. The inconsistency is usually 20-30% of your catalog, not 100%.
Week 2 — Define the 3-scene system. Workshop scene prompts with your team if you have one. Run 5 SKUs through each of the 3 scenes as a pilot. Review. Iterate. Lock.
Weeks 3-6 — Production rollout. Process Tier C SKUs first (highest visible-improvement return), then Tier B. Budget one half-day per 20 SKUs including curation and upload. Use Shopify bulk-editing tools to batch-upload.
Week 7 — Quality review. Visit your live storefront. Scroll every collection. Check the visual rhythm. Most remaining inconsistencies will be surfacing at weird crops rather than scene drift — fix with the image_url Liquid filter in theme code.
Week 8+ — Ongoing. Every new SKU onboarded goes through the 3-scene system from day one. New product photography becomes a 30-minute process, not a week-long project.
The small-ecommerce case study documents the economics of this migration for a real Shopify store — 200 SKUs, 85% cost reduction, 23% conversion lift attributed to improved imagery quality.
Your 7-Day Starter Plan for Shopify Photography in 2026
If you're reading this and thinking "I should do this but where do I start," here's the minimum starter sequence:
Day 1 — Scene system sketch. Write three scene prompts. Don't try to make them perfect. Draft is fine.
Day 2 — Pilot SKUs. Pick your top 3 highest-revenue SKUs. Feed one source image from each into AI Product Photoshoot. Generate one image per scene per SKU — 9 images total.
Day 3 — Review and refine prompts. What looks right? What's drifting? Lock the final scene prompts.
Day 4 — Full PDP pack for 3 pilot SKUs. 5 images each = 15 images. Upload to Shopify.
Day 5 — Publish and measure. Swap the old PDP imagery. Keep the old URLs for A/B comparison.
Day 6 — Check Core Web Vitals. Run your pilot PDPs through PageSpeed Insights. Confirm LCP < 2.5 seconds. If not, check image dimensions against rendered sizes.
Day 7 — Decide on rollout pace. Based on the pilot, estimate your total catalog migration time. Commit to a weekly SKU volume.
After day 7, the cadence repeats. The advantage compounds — by month 3, new product onboarding is baked into the brand system rather than a bespoke photography project each time.
Next Steps
Shopify rewards two things that most stores don't have simultaneously: visual coherence across 100+ SKUs, and Core Web Vitals tuned imagery. Both are now achievable at a fraction of the traditional cost, which shifts the competitive baseline — the brands investing in a brand-consistent AI-driven visual system will look premium next to brands still buying one-off photography per product.
If you're ready to start:
- Existing Shopify store, catalog is patchy: Start with the 7-day starter plan above. Run it against your top 10 SKUs before scaling.
- Launching a new Shopify store: Define your 3-scene system before uploading your first product. Everything else downstream is easier.
- Scaling to Plus / Hydrogen: Revisit your Core Web Vitals in Lighthouse. If your LCP is above 2.5 seconds, the image pipeline is almost always the culprit, and this pillar's performance section is your checklist.
Related reading
- The Visual Syntax Framework for AI Product Photography — the prompting methodology underpinning every scene definition
- AI Virtual Try-On: The Complete Guide — on-model imagery for fashion and accessories on Shopify
- Complete Guide to E-commerce Image Optimization — the technical SEO layer underneath Shopify's image pipeline
- 7 Best Practices for E-commerce Product Photos in 2026 — the foundational principles across platforms
- TikTok Shop Product Photography Guide for 2026 — the companion pillar for brands running Shopify and TikTok Shop in parallel
- Small E-commerce Saves 80% with Picoko — case study with concrete ROI math for the migration